Purple Velvet Cake With Cream Cheese Frosting
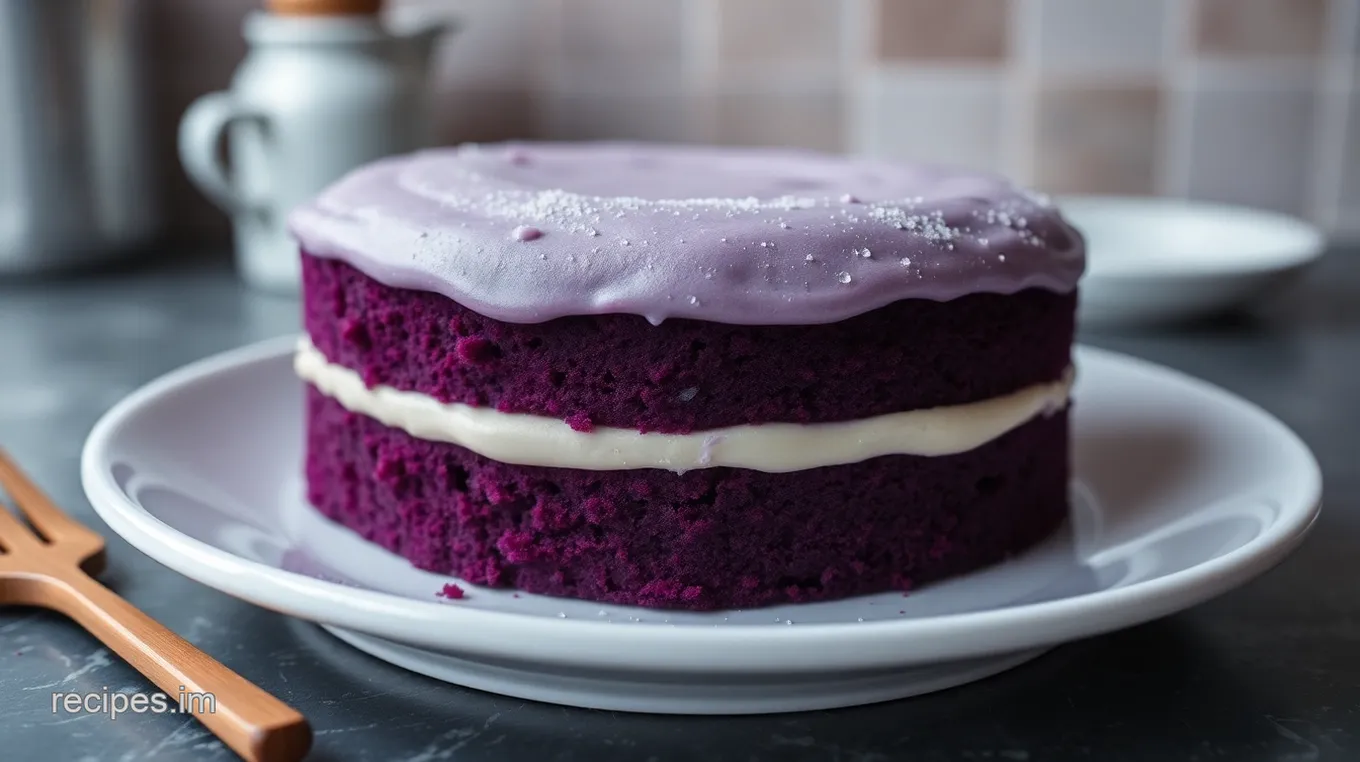
Craving something unique? My purple velvet cake, made with sweet potatoes and topped with creamy frosting, is perfect for any celebration. Dive in!

A Slice of the Unexpected: My Purple Velvet Cake Journey
So, let’s take a little trip down memory lane. picture this: my best friend’s birthday is coming up, and i’m staring at my kitchen, feeling the pressure.
I want to wow her with something special. that’s when i stumbled upon this purple velvet cake recipe. seriously, who wouldn’t be intrigued by a cake that looks like it just popped out of a fairy tale? using purple sweet potatoes for a twist on the classic red velvet, i knew i had to whip this up.
And oh my gosh, the excitement didn’t just stop at the looks!
The Backstory of Purple Velvet Cake
You might wonder where this beautiful idea came from. historically, velvet cakes were all the rage back in the day, but this modern version is the superstar now! it’s taken the cake world by storm, and rightly so.
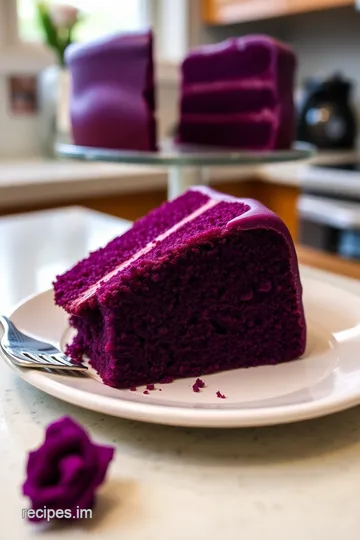
This cake isn’t just a feast for the eyes; it’s super moist and has this buttery flavor that steals your heart.
And with the trend of colorful desserts rising, the purple velvet cake hits all the right notes. you know it’s instagram-friendly, right? this cake typically takes about an hour and a half to make, but trust me, the joy of watching your guests’ faces when they see the vibrant color? totally worth it!
Why the Buzz? The Key Benefits
Now, let’s get into the nitty-gritty. What are the perks of making this fun cake?
First off, there are serious health benefits here! the purple sweet potatoes offer a punch of antioxidants, which are great for your body.
They add a subtle sweetness too, making this unique cake not just pretty but kind of good for you...in a dessert kind of way!
Then, there’s the creamy goodness. that cream cheese frosting for purple velvet cake is just divine. it’s the perfect balance of tangy and sweet, which pairs beautifully with the moist velvet layers.
Honestly, you can't go wrong with that combo!
This cake shines during special occasions. you’d be surprised how well it fits in as a showstopper for birthdays, parties, or even just a saturday night when you feel a little fancy.
There’s something special about cutting into a layered cake like this, revealing those stunning layers of purple goodness. perfect for festive cake ideas if you ask me.
Plus, when it comes to serving suggestions? The options are endless! You can pair it with fresh fruit, a scoop of vanilla ice cream, or even a sprinkle of edible glitter if you’re feeling extra!
Ready to look into In? Ingredients Are Next
Well, that about covers the why behind this purple marvel. now, if you’re ready to put on your apron and dive into cake-baking mode, we’ll get into the ingredients section .
Don’t worry, i’ve got your back with some tips to make it lightwork . stay tuned!

Your Essential Ingredients Guide to Baking Magic
Alright, friends! let's get down to the nitty-gritty of baking. if you want to whip up the most amazing purple velvet cake , you gotta start with the essential ingredients .
This guide is like your friendly roadmap to kitchen success, with tips, tricks, and some personal stories thrown in for good measure!
Premium Core Components
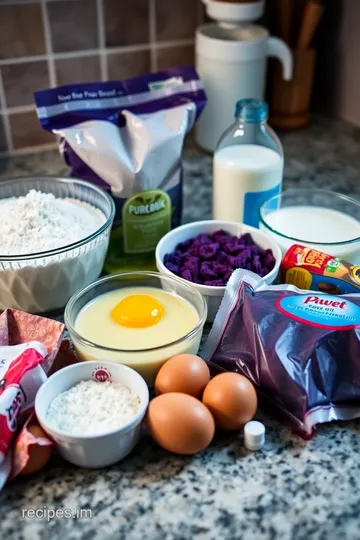
First up, let’s chat about those premium core ingredients . You'll need everything from flour to sweet potatoes for our cake, but knowing what you're working with is crucial. Here’s the scoop:
-
Measurements: when it comes to baking, precision is key. you’ll want 2 cups (250g) of all-purpose flour and 1 cup (200g) of cooked and blended purple sweet potato puree.
If you're measuring in metric, keep those numbers close!
-
Quality Indicators: Freshness is everything, y’all. Look for flour that’s light, not clumpy. Good sweet potatoes are firm, not soft or squishy.
-
Storage Guidelines: Store your flour in a cool, dark place. Sweet potatoes? Keep ‘em in a dry cupboard, away from light. Trust me, you want them to last!
-
Freshness Tips: Check your baking soda and powder! They should be fresh; otherwise, your cake won’t rise.
Signature Seasoning Blend
Next stop, let’s rock those flavors with some signature seasoning blends ! A little spice can turn your cake from good to “Oh my gosh, what’s in this?”.
-
Essential Spices: For our purple velvet cake, a dash of cocoa powder adds richness. I usually go for 2 tablespoons (30g) .
-
Herbs and Pairings: While herbs aren’t typically in cake, pairing fresh fruit is a game changer! Think blueberries or raspberries. And don’t forget vanilla extract — a must-have in any dessert.
-
Flavor Enhancers: Toss in a pinch of salt! It really helps balance the sweetness.
Smart Substitutions
Now, sometimes life throws you a curveball, right? So, here’s where those smart substitutions come in:
-
Common Alternatives: Don't have buttermilk? Mix regular milk with a tablespoon of vinegar to make your own.
-
Dietary Modifications: In case anyone’s gluten-free, swap all-purpose flour with a gluten-free blend !
-
Emergency Replacements: Out of eggs? Try unsweetened applesauce (about ¼ cup per egg ) instead.
-
Seasonal Options: Want to make this cake in the fall? Swap purple sweet potatoes for pumpkin puree!
Kitchen Equipment Essentials
Lastly, let's not forget the kitchen equipment essentials . This is where the real magic happens!
-
Must-Have Tools: You absolutely need mixing bowls , a hand mixer (or some elbow grease), and two 9-inch cake pans.
-
Alternative Equipment Options: No mixer? Grab a whisk! Your arms will get a workout, but it’s do-able.
-
Preparation Tips: Remember to preheat your oven to 350° F ( 175° C) ! And lining your pans with parchment paper ? Game changer!
-
Storage Solutions: Keep your baked cakes sealed tight to keep them fresh. Trust me; no one likes a dry cake!
Time to put those thoughts into action! you’ll soon create a stunning layered cake with vibrant purple hues that’ll knock everyone’s socks off.
Up next, we’ll dive into how to actually make your purple velvet cake, so stay tuned!
Mastering the Art of Professional Cooking
If you’ve ever wanted to elevate your home cooking skills, diving into professional cooking methods is the way to go.
Trust me; once you learn these essential techniques, you’ll be whipping up restaurant-quality meals in your own kitchen (and maybe even impressing all your friends).
Let’s break down the essentials into manageable bites, starting with those necessary preparation steps.
Essential Preparation Steps
First off, let’s talk about mise en place . this fancy term just means having everything ready before you start cooking.
Trust me; it makes a world of difference. chop your veggies, measure your ingredients, and have your tools on hand.
It feels like magic when everything flows smoothly while you cook, rather than searching for that elusive can of coconut milk!
When it comes to time management , i’ve learned the art of multitasking. set a timer for each step and keep an eye on the clock.
For example, if your purple velvet cake takes 30 minutes to bake at 350° f , use that time to prep your cream cheese frosting so when the cake’s ready, you’ve got your frosting made and waiting.
Staying organized is key. keep your workspace tidy. i like to take extra bowls or containers so i can separate wet and dry ingredients.
And don’t forget the safety bits! make sure to wash your hands, keep knives away from kids—safety first, right?
Step-by-Step Process
Now, onto the fun part—cooking! Here’s a simple guide you can follow:
- Preheat Your Oven : First, set it to 350° F ( 175° C) .
- Prepare Your Ingredients : Mix dry ingredients first and keep that in a separate bowl.
- Wet Ingredients : Combine items like eggs, oil, and buttermilk, blending them until smooth.
- Combine the Two : Gently mix your wet and dry ingredients. Remember, don't overmix. You want that deliciously moist velvet texture for your cake.
- Bake : Pour your batter into greased pans and bake for 25- 30 minutes . A toothpick should come out clean when your cake is done.
Watch for those visual cues. If you see that signature dome and the edges pulling away slightly, you’ve hit the jackpot.
Expert Techniques
Getting a handle on the little things can up your baking game. for instance, mastering the temperature control is crucial.
Ovens can be pesky; sometimes they run hot or cold. if your cake isn’t setting, try bumping the temp up a tad.
And when working with purple food coloring for baking , don’t go overboard—start with just a little until you reach that gorgeous hue you want.
Keep an eye on those quality checkpoints as you bake. taste your batter before baking (you know for quality control!).
And remember, if it looks a little off, it’s never too late to fix it. add more liquid, adjust the sugar, or toss in some vanilla extract if you need a flavor boost.
Success Strategies
Here’s where I learned from my many kitchen fails—avoid common mistakes. One biggie is knowing your oven temperature. Always use an oven thermometer. Not everything’s perfect at the default setting!
When it comes to frosting? i always double-check my cream cheese isn’t too warm. if it heats up too much, your cream cheese frosting for purple velvet cake may not set right; it’ll melt and slide off like it just gave up.
And don’t worry if things get messy—the beauty of cooking is figuring it out as you go.
If you want to make your cake ahead, you totally can! bake it a day or two beforehand, store it in the fridge, and frost it vigilantly just before serving.
You’ll impress everyone with your stress-free, smooth moves.
Wrapping It Up
So, whether you’re going for an eggless purple velvet cake or simply craving that moist velvet cake that has become a family favorite, knowing these professional cooking methods helps ensure perfect results every time.
The next time you bake, remember these tips, and make sure to enjoy yourself along the way. cooking should be fun, not a chore!
Now that you’ve got the basics down, get ready for some fascinating additional information that'll further your culinary journey! Stay tuned.

Additional Recipe Information for Purple Velvet Cake
Ah, the purple velvet cake ! it's like the cool cousin of the beloved red velvet. seriously, if you haven’t tried it yet, you’re missing out on a wild ride of flavors and colors.
Let’s dig into some of my favorite pro tips , presentation secrets, storage hacks, and more! trust me, you’ll want to bookmark this section.
Pro Tips & Secrets
First, let’s talk about making this cake as delicious as it is pretty. here’s the scoop: use purple sweet potato puree instead of just regular food coloring.
Not only does it add that gorgeous hue, but it also puts a sweet twist into your cake! and if you’re in a pinch, remember to whip up that batter as gently as possible.
You want a moist velvet cake , not a brick, right?
Now, for saving time, consider baking the layers a day ahead. just wrap those babies up tight and stash them in the fridge overnight.
They’ll be even moister when you frost them the next day. oh, and don’t forget the frosting! the cream cheese frosting for purple velvet is everything.
It’s rich and silky, so get that frosting mix going while the cakes are cooling down. it saves time and gives you a sense of accomplishment!
Perfect Presentation
Okay, let’s get into the art of plating . a colorful dessert deserves all the attention! try alternating the cake layers if you're feeling adventurous—maybe add some jam or compote between the layers for a burst of flavor.
When it comes to frosting, smooth it out beautifully using a cake turntable. it makes the job way easier!
For that extra sparkle, sprinkle on some edible glitter or crumbled walnuts. you could even toss on a few fresh fruits like berries for that pop of color.
And aesthetic goals aside, it tastes great too! trust me; your guests will be raving about not just how it looks but how it tastes.
Storage & Make-Ahead
Now, let’s talk storage. this cake is like a fine wine—it gets better with time! just make sure you keep it in an airtight container in the fridge.
It’ll last about 5 to 7 days . want to make it ahead of time? you can bake and freeze the layers.
Wrap them well and toss them in the freezer for up to three months. just let them thaw before frosting, and you’re golden.
Reheating isn’t necessary for this beauty, but if you'd like a bit of warmth, microwave a slice for about 10-15 seconds .
It gives that velvety texture a cozy vibe. perfect for those cold nights!
Creative Variations
Feeling a little wild? switch it up! if you’re diving into unique cake recipes , try eggless purple velvet cake for a vegan treat or go gluten-free for those with dietary restrictions.
How about adding a hint of almond extract instead of vanilla for a nutty twist? purple sweet potato recipes are versatile! mix in some spices like cinnamon or nutmeg for a seasonal punch.
Trust me, you’ll have your guests guessing what makes it so unique.
Complete Nutrition Guide
This cake may feel like a guilty pleasure, but there’s some goodness in there too! each slice packs a flavorful punch with around 400 calories .
It’s got some carbs and a bit of protein thanks to those eggs. if you’re wondering about portions, just remember that moderation is key—even at birthdays! you could also serve smaller slices with some fresh fruit to balance it out.
Expert FAQ Solutions
You’ve got questions? i’ve got answers! a common one is about texture—if your cake seems dense, check that you didn’t overmix the batter.
If you're wondering how to store leftover frosting, just pop it in the fridge; it’ll keep for about a week.
Got leftovers? freeze them for future bake-offs. for flavor variations, remember— layered cake recipes are kind of free-spirited! experiment with different frostings or fillings.
In conclusion, whether you're making it for a birthday bash, a spring festive gathering, or just a good old tuesday treat, you can’t go wrong with this purple velvet dessert .
It’s not just about making a cake; it’s about creating edible art. so roll up your sleeves, gather your ingredients, and get ready to impress! you’ve got this!

Purple Velvet Cake With Cream Cheese Frosting Card

⚖️ Ingredients:
- 2 cups (250g) all-purpose flour
- 1 ½ cups (300g) granulated sugar
- 1 cup (240ml) vegetable oil
- 1 cup (240ml) buttermilk
- 1 cup (200g) purple sweet potato puree (cooked and blended)
- 3 large eggs
- 2 tablespoons (30g) unsweetened cocoa powder
- 1 teaspoon (5g) baking soda
- 1 teaspoon (5g) baking powder
- ½ teaspoon (2g) salt
- 1 teaspoon (5ml) vanilla extract
- 1 tablespoon (15ml) purple food coloring (optional for additional vibrancy)
- 8 oz (225g) cream cheese, softened
- ½ cup (115g) unsalted butter, softened
- 4 cups (500g) powdered sugar
- 1 teaspoon (5ml) vanilla extract
- 2 tablespoons (30ml) milk (if needed for thinning)
🥄 Instructions:
- Step 1: Preheat the Oven: Set the oven to 350°F (175°C) and prepare the cake pans with parchment paper.
- Step 2: Make the Cake Batter: In a large mixing bowl, sift together flour, cocoa powder, baking soda, baking powder, and salt.
- Step 3: In another bowl, combine oil, sugar, buttermilk, sweet potato puree, eggs, and vanilla extract; mix well.
- Step 4: Gradually add dry ingredients to wet ingredients, stirring until just combined.
- Step 5: Fold in food coloring, if using.
- Step 6: Bake the Cakes: Divide batter evenly between prepared pans and smooth tops. Bake for 25-30 minutes until a toothpick comes out clean.
- Step 7: Cool the Cakes: Allow cakes to cool in pans for 10 minutes, then transfer to wire racks to cool completely.
- Step 8: Prepare the Frosting: Beat together cream cheese and butter until smooth. Gradually add powdered sugar and vanilla; mix until creamy. Adjust consistency with milk if necessary.
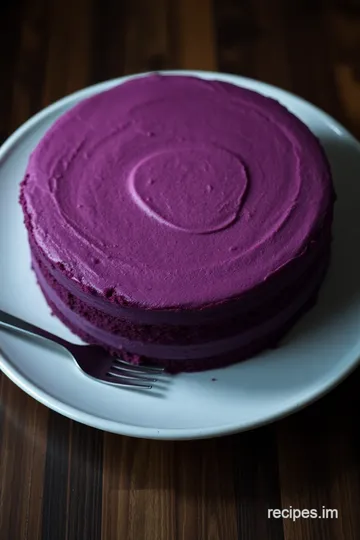
- Step 9: Assemble the Cake: Once cakes are completely cooled, frost the top of one cake layer, place the second layer on top, and frost the top and sides fully.
- Step 10: Chill and Serve: Refrigerate for at least 30 minutes to set the frosting before slicing and serving.
Previous Recipe: My Grandma's Ultimate Lipton Onion Soup Mix Meatloaf: 5 Easy Ways to Wow Dinner!
Next Recipe: My Grandmother's Easy Cucumber Salad Din Tai Fung: 5 Delicious Tips!
